Ghee Butter Guide
Ghee Butter, which is similar to clarified butter or drawn butter, has been becoming more popular lately for its health benefits. Find out what you need to know about ghee butter today in our guide.
What is Ghee Butter?
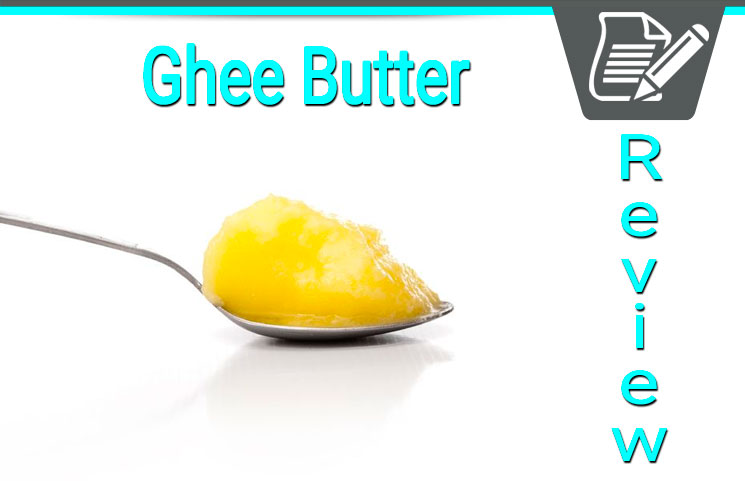
Ghee Butter consists of the translucent golden butterfat left over after the milk solids and water are removed from regular butter.
Regular butter contains compounds like butterfat, milk solids, and water. When making ghee butter, the milk solids and water are removed.
The butter is also known as clarified butter or drawn butter – although ghee is not exactly the same as clarified butter.
Essentially, ghee is just butter that contains only pure butterfat.
One of the unique characteristics of butter is that it has a higher smoke point than regular butter. That means you can cook it for longer at higher temperatures without ruining the dish. It also means it won’t spoil as quickly.
Ghee is also prized for its health benefits – as you’ll learn at the bottom of this page.
Ghee Versus Clarified Butter
Ghee is a specific type of clarified butter. Ghee is clarified butter that has been cooked longer to remove all the moisture. The milk solids in the butter are browned (i.e. caramelized) in the fat before being strained out. This gives ghee a rich nutty taste.
This difference in processing also gives ghee another advantage: it has a longer shelf life both when it’s refrigerated and when it’s at room temperature.
Ghee is commonly found in Indian cuisine. You can purchase butter ghee from a wide range of online and offline retailers, or make ghee yourself at home.
How to Make Ghee Butter at Home
Making ghee butter at home is probably easier than you think: you basically just boil butter until it melts, then allow the compounds to separate from each other naturally with heat. Here’s the step by step guide:
— Step 1) Place one pound of unsalted butter in a pan on your stove. 1 pound of butter makes approximately 1.5 cups of clarified butter or ghee.
— Step 2) Melt the butter over low heat. After the butter has melted, continue heating it over low heat.
— Step 3) When the butter starts to boil, it will begin to foam and sputter as the water inside boils off. Continue to boil the butter (uncovered).
— Step 4) Eventually, you’ll notice that the butter has separated into three layers. The top layer of the butter is a thin layer of foam. That’s the butter’s water content boiling away. The middle layer contains the liquid. And the bottom layer is where the milk solids have settled.
— Step 5) Continue heating the butter until the foam or water on top has boiled off. Eventually, you’ll notice that the liquid on top becomes more and more transparent. When the clarified butter has a golden transparent color, that means that the foam has all but disappeared from the surface. The solids will have settled to the bottom. This entire process should take about 30 minutes, depending on your stove and assuming you’re heating on low heat.
At this point, your clarified butter is ready. Skim off the foam and let the butter cool while solids continue to settle. You’ll need to filter the butter to remove additional impurities (see below for filtering tips).
If you’re making butter ghee, however, then you’ll need to keep cooking and follow these steps:
— Step 6) Continue to slowly cook the butter over low heat, watching it carefully and stirring it from time to time. You’re waiting for the milk solids on the bottom of the pan to caramelize and turn brown. When this happens, the liquid will deepen to golden and turn translucent and fragrant. You should notice a popcorn smell.
— Step 7) Immediately remove from heat once you notice the solids are browning. If you wait too long, then you’ll burn the residue and all of your ghee will have an unpleasant burnt taste. It may take a few tries to get this perfect.
Additional Tips For Making Your Own
Here are some additional tips for making your own clarified butter or butter ghee:
— As soon as the foam or water on top of the butter has disappeared, remove it from heat immediately, as it’s very easy to burn the butter.
— Pour the hot melted clarified butter through a cheesecloth, fine-mesh skimmer, or tea strainer to effectively filter out any foams or solids, leaving you with pure clarified butter.
— Pour the hot melted butter into a container and allow it to separate on its own while cooling, and then refrigerate. As the butter solidifies, you can easily scrape the hardened foam off the top.
— Some people also separate their butter using a gravy or fat separator, while others strain the melted butter through a coffee filter
— Use unsalted butter or organic butter or the best butter you can purchase. Cheap butter will contain higher levels of water and chemicals and will burn more quickly.
— 1 pound of unsalted butter will give you about 1 ½ cups of clarified butter or ghee. Always start with about 25% more unsalted butter than the amount of clarified butter you need.
Health Benefits of Ghee Butter
Ghee butter has been connected with a wide range of health benefits and cooking benefits. Here are some of the reasons why people enjoy using ghee or clarified butter:
— Higher Smoke Point when Frying Foods: Ghee can be used as a replacement for olive oil, normal butter, and coconut oil when cooking, making it an ideal choice for frying foods.
— Better Digestive Health: Ghee is rich in butyrate, which is a short chain fatty acid linked to an immune response. That immune response can decrease inflammation and improve your digestive system.
— Topical Skin Treatment: Ghee can also reduce inflammation when rubbed topically on your skin. Some people use ghee to treat redness or inflammation across the body, for example. In traditional medicine, ghee was also used to treat burns and swelling.
— Tastes Better than Butter: Ghee has a distinctive flavor from regular butter. Most people agree that it’s nuttier than regular butter. If you’re sick of that same old butter flavor on your popcorn, rice, vegetables, and bread, then ghee may be a tasty replacement.
— Lasts a Long Time: Ghee can last for up to three months if you store it in an airtight container. It also does not need to be refrigerated.
— Non-Dairy: Ghee has virtually no lactose and is also very low in casein, which is the main protein found in milk. If you can’t have dairy, then you should be able to enjoy ghee.
— Vitamins and Minerals: One tablespoon of ghee can give you 15% of your daily recommended value of vitamin A. The butter also contains high levels of vitamins D, E, and K.
— Facial Moisturizer: Women in India have traditionally used ghee as a moisturizer on their skin and hair. You can use it on your scalp to fight dryness or to hydrate your face.
In India, ghee has a long and interesting history. The ancient Dharmasutra laws of India, for example, mention ghee as being a key part of religious rituals. Today, ghee can be found at health food stores across the world and can easily be ordered online or made yourself.


